

[ad_1]

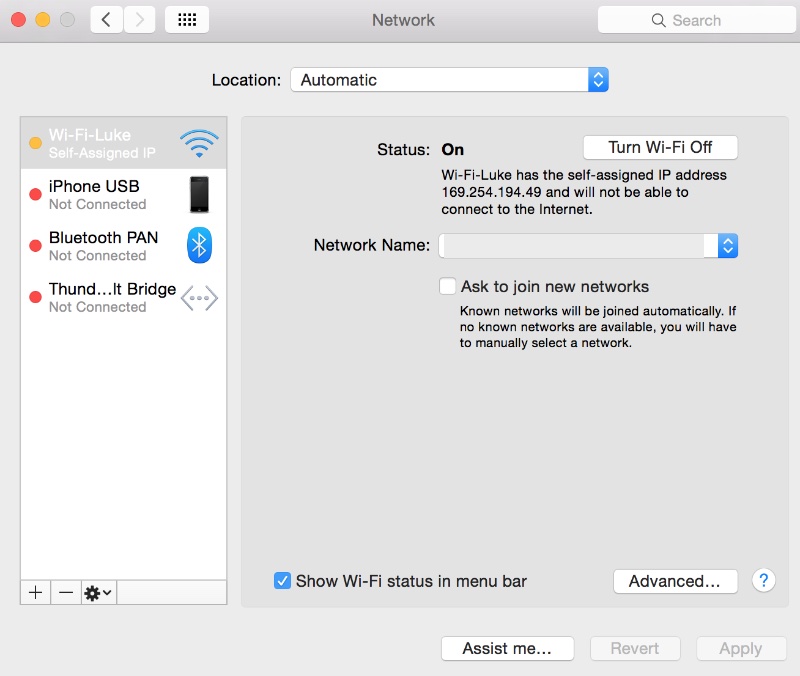
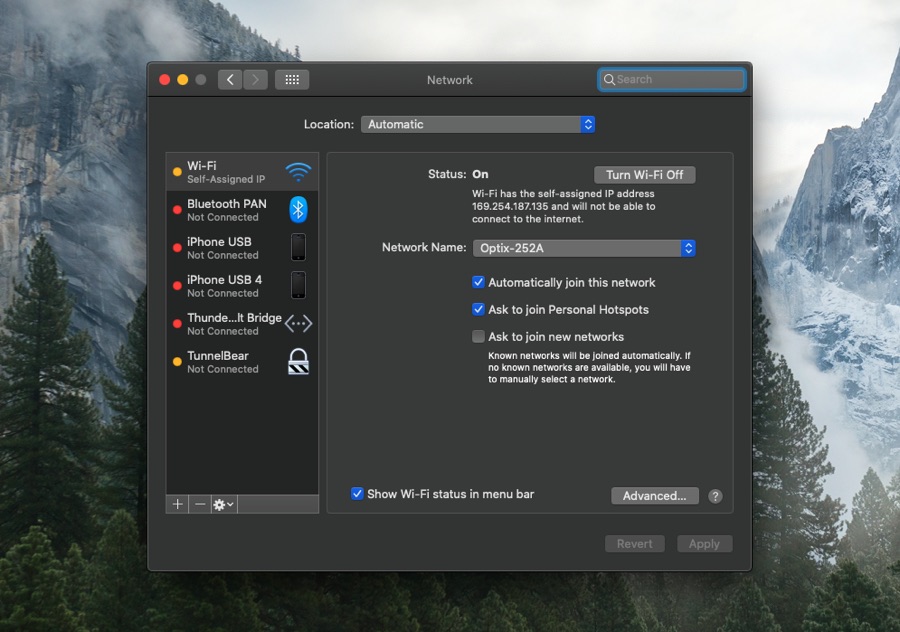
If your Mac is connected to a working Wi-Fi network but the Internet is still not working, then we have got the solution for you. A lot of times your Mac is issued a self-assigned IP, which causes the Internet to not work on the machine. Despite the same Wi-Fi network working on other devices, the Mac will simply show no internet connection error and Internet will not work on it. In these situations Wi-Fi has the self-assigned IP address and will not connect to the Internet despite the Internet working on other devices.
On the Network Preferences page the Wi-Fi will also show the Self-Assigned IP Address text instead of connected. This is a very annoying problem that can cause Internet to not work on your Mac. Not having a working Internet connection on your Mac due to Mac’s self assigned IP problem can prevent you for doing work and render your Mac useless.
Good thing is self-assigned IP issue on Mac is quite easy to solve. You can fix the self-assigned IP address issue and get the Internet to work again on your Mac by simply deleting a few files on your machine. Simply follow the steps below from an administrator account and put the mentioned files in trash.
This solution works on all recent versions of macOS including macOS Catalina and macOS Mojave.
Fix Self-Assigned IP Address Issue on Mac
You can use to solve the self-assigned IP address issue on your Mac running macOS High Sierra, macOS Mojave and the latest macOS Catalina.
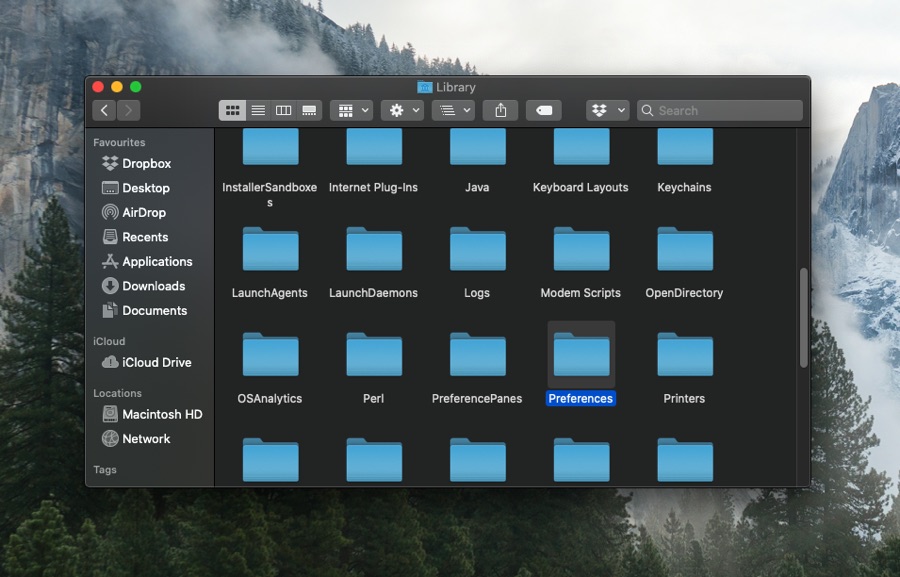
1. On your Mac launch finder and click on Macintosh HD. (Don’t see Macintosh HD? See here)
2. Click on the Library folder and go to Preferences.

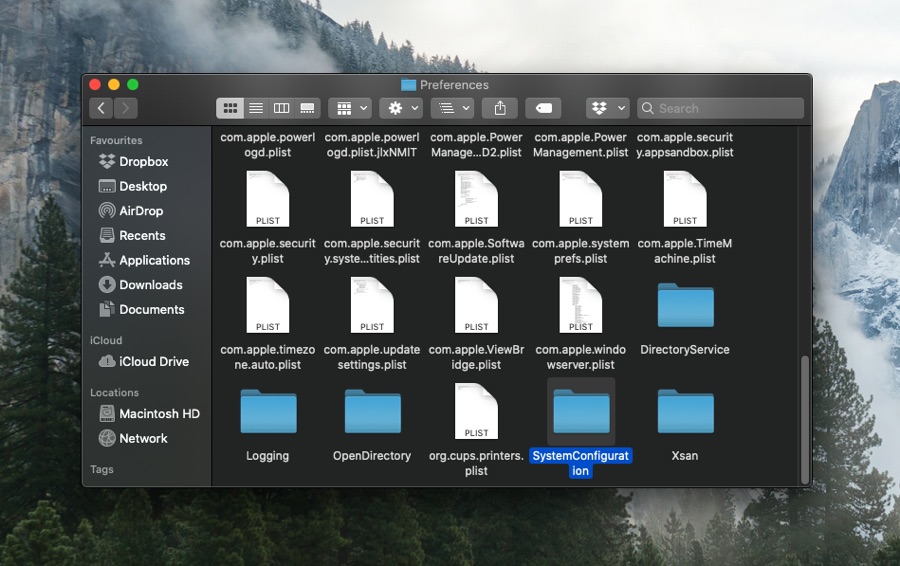
3. Now click on the SystemConfiguration folder.

4. Next put the following files in trash.

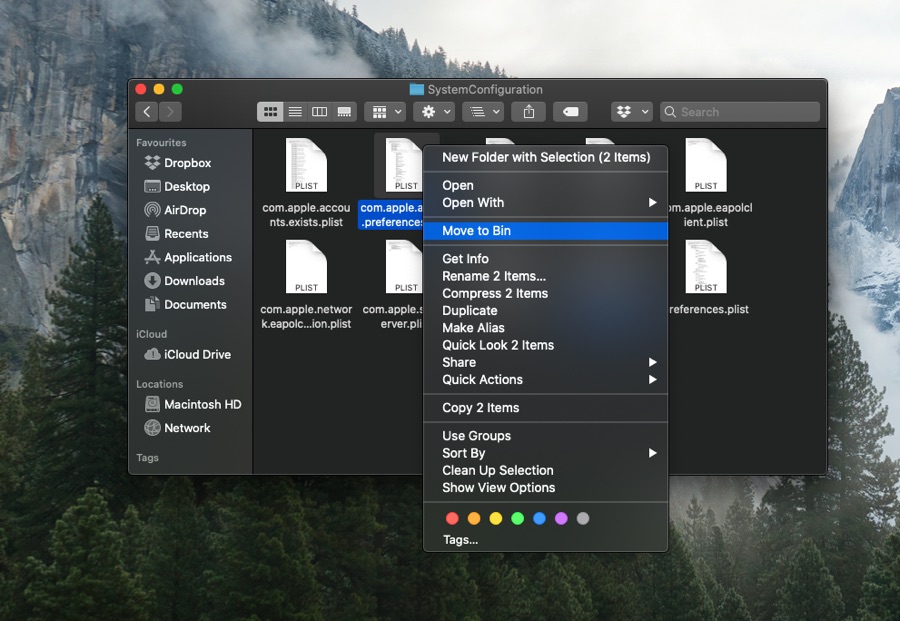
- com.apple.airport.preferences.plist
- com.apple.network.identification.plist
- NetworkInterfaces.plist
5. Restart your Mac.
Once the reboot has taken place the Internet will start working and self assigned IP address issue will be resolved.
If you don’t see all the files mentioned above, then just delete the ones that are present and reboot your machine.
How to Reset Mac’s IP address
In case you’re looking to reset your Mac’s IP address to solve internet connection problems with your computer, then the following instructions will help. If deleting the files mentioned above does not help, then the steps to reset Mac IP address can also prove helpful in fixing self-assigned IP Mac problem.
1. On your Mac open System Preferences.
2. Click on Network icon.
3. Make sure Wi-Fi is selected from the side pane and then click on ‘Advanced’ button.

4. Now click on TCP/IP from the top navigation bar.
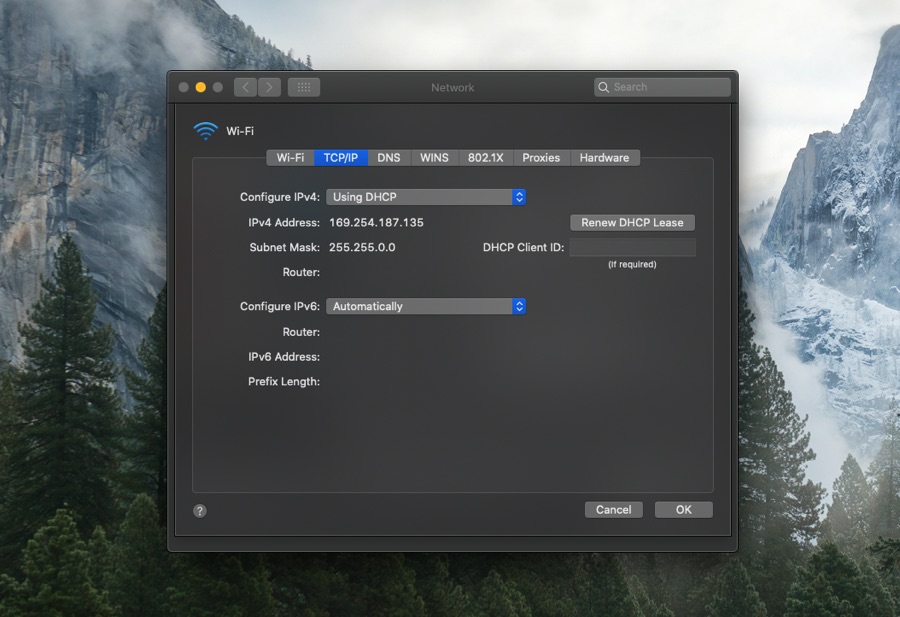

5. Next click on ‘Renew DHCP Lease’ button.
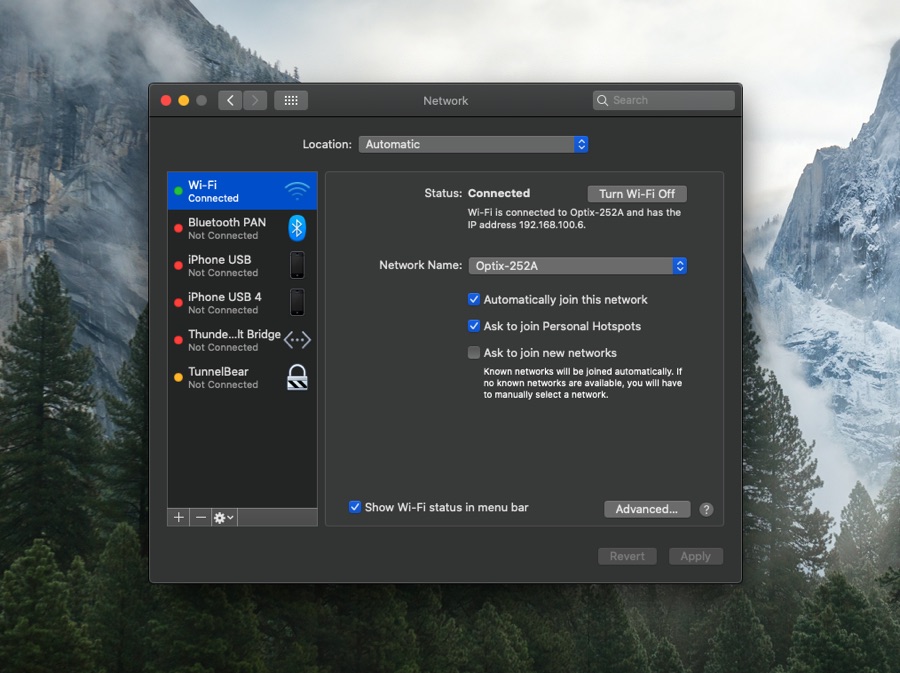
6. Click OK to exit and from the top menu click on the Wi-Fi button and turn off Wi-Fi.
7. After a few seconds turn Wi-Fi back on and connect your Mac to your Wi-Fi network.
8. At this point Self-Assigned IP address issue should get solved and Internet should start working again.

There you have it, this is how you can easily and quickly fix Self-Assigned IP address issue on Mac and get your Internet connection working once again. If you have any questions regarding this tutorial, then feel free to let us know in the comments section below.
[ad_2]