

your website is receiving an excessive amount of visitors in your present host and your website is performing slowly because of this. Regardless of the cause you must migrate to a brand new host, and also you’d like your migration to go away little to no downtime.
Even the considered migrating your website to a wholly new host could be disturbing. Nonetheless, the expertise isn’t as dangerous because it appears. Certain, it does take loads of prep work, however by following the steps under you’ll be capable of migrate your WordPress website to a brand new host in essentially the most seamless method potential.
Beneath we dive into how one can simply transfer your WordPress website from one host to a different. The method is a bit of technical, nevertheless it isn’t something you shouldn’t be capable of deal with.
Earlier than we transfer ahead it’s vital to say that almost all internet hosting suppliers do provide WordPress migration providers. Normally, these gained’t be marketed, however you will get in contact with assist they usually’ll level you in the suitable path. The price of these providers will differ relying upon your present internet hosting supplier and the host you’re switching to.
Another factor. You’ll be able to backup and migrate over your website by means of just a few completely different means. The most typical contain utilizing FTP software and doing the backup your self, or using a plugin like BackupBuddy to deal with a few of the heavy lifting for you.
Since we wish to take away all potential hurdles in switching over your website, we’re going to indicate you migrate your website with out the assistance of a paid plugin.
1. Selecting Your New Host
Selecting the best internet host in your wants is a giant choice. Because you’re switching to a brand new host this most likely means you’re dissatisfied along with your present internet hosting supplier, otherwise you’ve outgrown what they’ll present for you.
Beneath we profile just a few of our favourite internet hosting suppliers, that can assist you take advantage of knowledgeable choice potential. Finally, the choice you make is as much as you, however any of the three under are nice decisions.
Bluehost

Bluehost is a good alternative for these in search of a easy shared internet hosting surroundings. In fact, shared internet hosting isn’t good for each type of web site, particularly in the event you’re receiving excessive ranges of visitors, however it may be an ideal place to start out.
As a bonus shared internet hosting normally provides essentially the most setup help in relation to getting your website up and operating.
When you’re searching for a cheap hosting solution for a more moderen web site, then Bluehost is among the finest newbie WordPress hosts on the market.
Plus, Bluehost is definitely on the checklist of hosting providers that WordPress recommends to their customers. You’ll be able to’t get the next suggestion than that, particularly in case your website runs on WordPress.
WP Engine
When you’re searching for a extra intensive and customised internet hosting surroundings, then WP Engine may be an ideal alternative in your wants. WP Engine is a managed WordPress internet hosting surroundings, which signifies that they deal with every little thing for you. A number of massive WordPress web sites belief WP Engine to offer them with the extent of assist their websites require.
WP Engine is the equal to having a group of WordPress consultants in your aspect, optimizing your website, managing your internet hosting surroundings, and defending your website from the onslaught of on-line threats.
Some choices included with a WP Engine internet hosting bundle embrace:
- Computerized safety updates
- Each day web site backups
- Excessive-level of WordPress safety
Plus, WP Engine is nice for websites that want to scale. They’re a internet hosting supplier that may develop along with your web site and doesn’t maintain you again in case your visitors ranges proceed to develop.
In line with many hosting reviews WP Engine’s support staff is consistently rated one of the best.
Additionally they present a very simple to make use of problem free weblog migration service with their very own custom WordPress plugin.
SiteGround
SiteGround is a managed WordPress internet hosting surroundings, which implies all the technical features of the internet hosting surroundings are taken care of for you. When you’re a really technical individual and love the problem of organising and customizing your individual servers, then this most likely isn’t for you.
However, if the considered having all the heavy technical parts of your website taken care of fills you with glee, then it’s worthwhile to pursue this feature. Face it, as a web site proprietor you have got loads in your plate, do you actually wish to add managing your server to this checklist as nicely?
By way of managed WordPress hosting they do provide a few of the most versatile choices. Some managed WordPress hosts are set in stone and don’t enable any customization in any way, this internet hosting supplier isn’t a type of.
They’ve very quick host efficiency and have quite a lot of internet hosting choices to fit your wants. Plus, SiteGround has already been round for 10 years, so they’re doing one thing proper.
CloudWays
Cloudways is a managed cloud host that means that you can deploy WordPress by means of the cloud deployment of your alternative. With Cloudways you’ll be able to select both Digital Ocean, Linode, or Amazon AWS to deploy your website. It’s not solely a WordPress host, as they provide different CMS and website choices, however when you deploy WordPress your internet hosting might be managed.
Better of all there aren’t any restrictions in your WordPress website, which loads of different hosts make use of. Usually, cloud hosting platforms could be troublesome to handle, however with the Cloudways managed resolution it’s actually as simple as pushing just a few buttons.
Have you ever chosen your new host but? Good, let’s transfer ahead.
2. Backing Up and Migrating Your Current WordPress web site
It’s vital that you simply truly buy your new internet hosting earlier than you progress ahead with the swap. You’ll must have login credentials along with your new website to really make the location switch.
When you’ve made the choice about which host you’re going to make use of it’s time to backup each component of your web site. This can be a good factor to do regularly, simply to make sure you can restore your website in case one thing tragic occurs. However, it’s completely essential to do earlier than you progress ahead with any of the steps under.
When the time involves backup and migrate your website you’re going to have the ability to use a FTP shopper like, Filezilla, or the cPanel that comes along with your present host. We’ll define each strategies under.
Migrating Utilizing Filezilla
When you’re going to make the most of an FTP supervisor like Filezilla, then comply with the steps under. First, obtain and set up the free software program from this link. To maneuver ahead you’ll want the login info for each your present and new internet hosting accounts.
1. Connect with Your Website
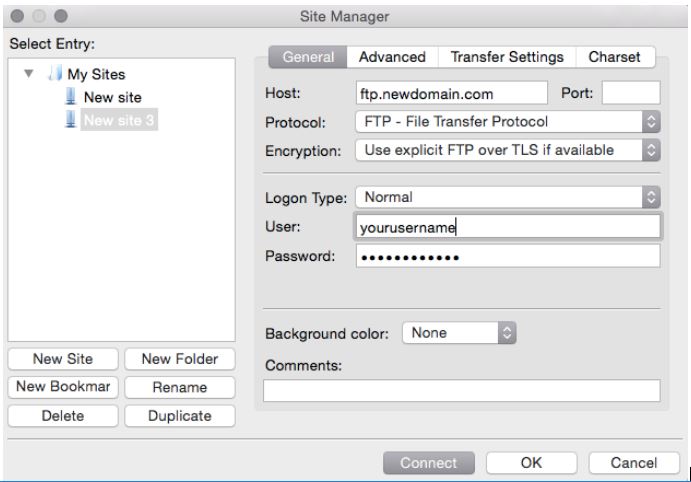
Connect with your present website. When you’re uncertain how to do that, check out this tutorial from WordPress. To attach you’ll want the username and password you got to connect with your account.
2. Navigate to public_html
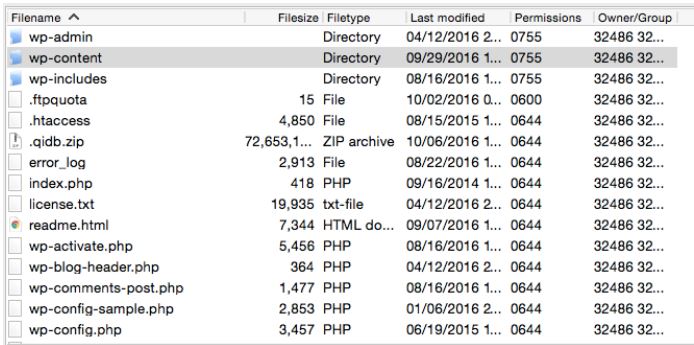
When you’re looking by means of your website’s information navigate to the public_html file. That is the place your whole website’s information are contained. Obtain your whole present website’s information. This could take a while relying upon the scale of your website and your Web connection.
3. Add to Your New Host
As soon as all the information are downloaded, you’ll wish to login to your new host. Navigate to your public_html folder in your new area and add all the website information you simply downloaded.
When you downloaded the suitable information, then your new website might be migrated to your new host.
Migrating Utilizing cPanel
Transferring your website through cPanel is far sooner and could be much less intimidating. Plus, it doesn’t require putting in any software program in your native pc. However, it solely works if each your present host and new host are using cPanel.
1. Find the File Supervisor
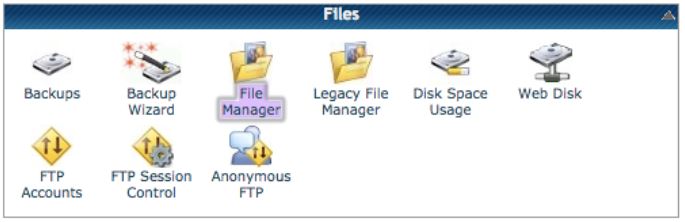
The very first thing you’ll wish to do is find the ‘File Supervisor’. That is the place your whole website’s information might be held. Double-click to open this.
2. Obtain Your Website’s Information
Contained in the file supervisor find the public_html folder, then click on on the folder the place your whole website’s info is contained. This may both be the public_html folder, or it’ll be named one thing like yourdomain.com, relying you probably have a number of area installs.
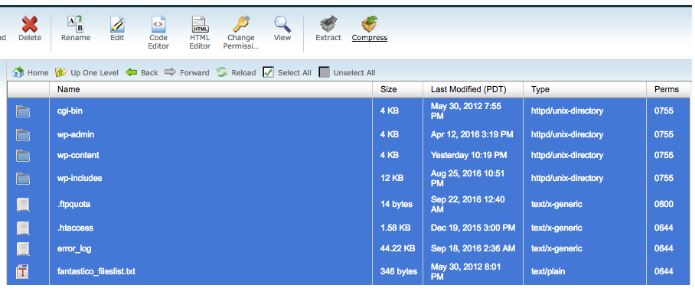
Click on ‘Choose all’, then ‘Compress’.
Then, create a .zip file and save the zip file to a similar location in your pc. It will also be useful to create a duplicate of this file and retailer it in a secure place as a web site backup.
3. Create a New Area On Your New Host
Now, you’re going to login to your cPanel in your new host. When you haven’t performed so already, then you definitely’ll wish to add your area to your new host.
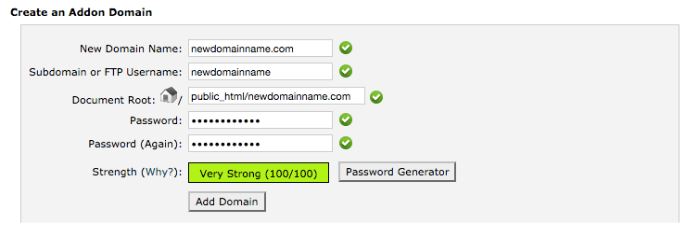
Navigate to ‘Addon Domains’
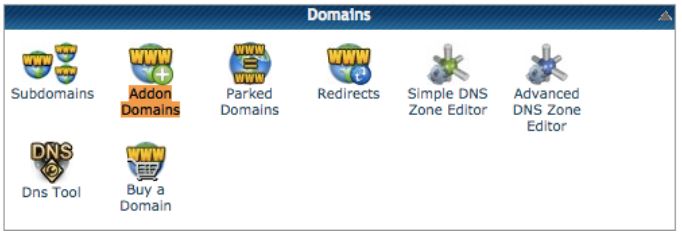
On the subsequent display screen you’ll add your new area identify. Fill out all the mandatory particulars and click on ‘Add Area’.
4. Add Your Previous Website to Your New Host
You’ve made it to the ultimate step. Now you’re going so as to add the information you downloaded above to the brand new area you’ve simply created.
Navigate again to your ‘File Supervisor’ and navigate to the public_html folder of the brand new area you created. Now you’ll add the .zip file to that folder and use the built-in unzip operate.
When you’ve performed that efficiently, now you’ll have migrated your website’s content material to your new area.
When you’ve adopted all the steps above, then your new website ought to be appropriately uploaded to you new host. Now, all you must do is transfer over your WordPress database to make the file switch full.
5. How one can Transfer Your WordPress Database
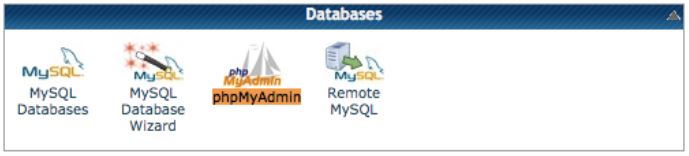
The ultimate step of the location switch course of entails transferring over your WordPress database to your new host. To do that we’ll be utilizing a software referred to as ‘phpMyAdmin’.
In your cPanel navigate to ‘phpMyAdmin’, as proven within the picture under.
1. Discover the Proper Database
On this display screen you would possibly see a bunch of various databases listed. When you’re undecided which database you’ll must entry and obtain, then comply with the steps under.
Navigate again to your website’s information through ‘File Supervisor’ and discover a file referred to as wp-config.php. You’ll be able to open this file utilizing the built-in code editor, or your editor of alternative. With the file open search for a line of code titled: outline(‘DB_NAME’, ‘the identify of your database’). This may present you the identify of the database you’ll wish to obtain on the earlier display screen.
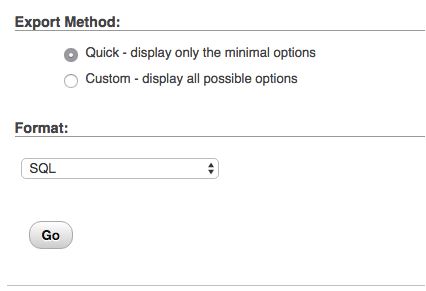
2. Export Your Database
Choose the database you discovered within the step above and choose the ‘Export’ possibility on the highest navigation bar, then click on on ‘Go’ and put it aside to your pc.
3. Login to Your New Account
Now, login to your cPanel in your new internet hosting account, and search for an app titled ‘MySQL Database Wizard’.
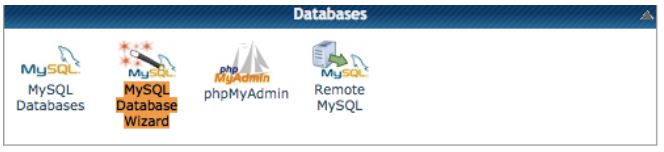
The setup wizard will stroll you thru the method of making a brand new database. This may create an empty database which you’ll fill with the database info you downloaded earlier.
Be sure you preserve monitor off the brand new database info as you create it, you’ll want this info to finish the ultimate step within the migration.
4. Import Your Database
To fill in your empty database you’ll wish to entry the ‘phpMyAdmin’ app within the cPanel of your new host. Now, navigate to the empty database you created earlier and choose add from the highest navigation menu.
Discover the database you downloaded out of your previous host and click on ‘Go’. This may add your previous database to your database in your new host.
Now, you simply have one remaining step to go.
5. Replace Your Configuration File
The ultimate factor you’ll must do is replace the wp-config.php file in your new host along with your newest database info.
Navigate to your ‘File Supervisor’ and find the file titled ‘wp-config.php’. Open this file and also you’ll want to vary three issues: your database identify, username, and password. You’ll have created these in step quantity three above. It’ll look one thing just like the picture under.
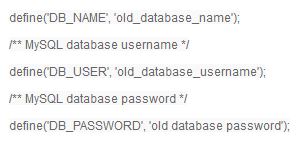
When you’ve up to date these it can save you your file and the migration course of might be full!
6. Switching to Your New Nameservers
If you wish to keep away from any downtime in switching over your website, then this ought to be the ultimate step within the course of.
The ultimate step within the web site migration course of is switching over your nameservers. To do that you’ll must login to the dashboard of your present area identify supplier.
Once you signed up in your new host it’s best to have acquired an e mail that accommodates your nameserver info. Your nameservers will generally seem like this:
ns1.mynewhost.com
ns2.mynewhost.com
Discover your present nameservers, then merely copy over your new nameservers, then click on save. Typically it could possibly take as much as 24 hours in your nameservers to level to your new host, however normally they’ll switch over instantly.
For a fast evaluation, to make sure you’ve accomplished each step of the method we’ll evaluation them, so you can also make certain your switch goes easily:
- Select a brand new host and join a brand new internet hosting bundle.
- Backup and obtain a duplicate of your website’s information through cPanel or Filezilla.
- Login to your new host and create a brand new area (if wanted) and add your website’s information through cPanel or Filezilla.
- Obtain your WordPress database by means of the software phpMyAdmin.
- Create a brand new WordPress database along with your new host by means of MySQL Database Wizard.
- Add your downloaded database into the empty database you’ve created.
- Change your wp-config.php file utilizing Filezilla, or File Supervisor inside cPanel, and replace the knowledge to mirror your newly uploaded database.
- Lastly, change your nameservers to these supplied by your new internet hosting account.
When you’ve efficiently accomplished each step outlined above, then you definitely’ll have efficiently migrated your WordPress website.
In Closing
Hopefully, the steps above will show you how to seamlessly migrate your website from one WordPress host to a different. If the above course of is to technical for you, you’ll be able to at all times get in contact along with your new host, and sometimes they’ll stroll you thru the migration course of, or will even do it for you for a price.
On the very least, the knowledge above will show you how to perceive the host migration course of a bit of higher, and what truly occurs behind the scenes.