

[ad_1]
If you are also annoyed by High Disk Usage on your system, we’ve got you covered. We will be sharing some of the best methods that you can use to fix Microsoft Compatibility Telemetry High Disk Usage. For that, you need to know some of the most common reasons for this issue.
Microsoft Compatibility Telemetry High Disk Usage is a serious issue if you are running low on Disk Management. At the end of this, you will have some working solution for this issue. Without wasting any more time let’s first talk about what is Compatibility Telemetry High Disk Usage.
Microsoft Compatibility Telemetry High Disk Usage
What is Microsoft Compatibility Telemetry High Disk Usage exactly? Well, it is an automated service. In this, the system collects your data from the computer and sends it to the Windows Development Team. This data helps Microsoft Team to improve the Windows build & provide fixes of any bug found.
As it is a concern about privacy, you would not like to allow Windows to collect & send your data. Although, the company has already said that this data is used for development purposes only. Also, this collection of data may also increase the disk usage on your device.
This will ultimately result in more power consumption and less memory available comparatively. You can use various methods to fix Microsoft’s Compatibility Telemetry High Disk Usage issue. Windows collects many types of data from your Hardware & Software description.
Data Collected in Compatibility Telemetry High Disk Usage
As mentioned earlier, there are various types of data that Windows collects and Sends for Development Purposes. Some of the most common data is collected as:
- Whatever you type from the keyboard in a period of 30 minutes.
- Whatever you say to Cortana (Microsoft’s Voice Assistance).
- A list of all multimedia files on your computer is shared with the Windows developer team.
- The first 35MB consumption of Webcam recording/captures is shared as well.
- Type of hardware installed on the device.
- Details of Drivers on the System.
So, Microsoft collects data and sends it to its Developer Team periodically. You need to know about what type of data is being sent & how you can control it. If you think that you really need to disable this program, you can do it very easily. We’ve shared various methods to fix this issue.
5 Methods to Disable or Fix Microsoft Compatibility Telemetry High Disk Usage Issue
There are various methods you can use to fix this issue on your Windows system. We have shared some of the best & working steps to fix the High Disk issue. Please follow the steps carefully & share your experience in the comments.
These are the most common and easy 5 Methods that you can do easily on your systems. This will allow you to fix the Compatibility Telemetry High Disk Usage Issue on your Windows system. Make sure you follow all of the steps on any method carefully.
Disable Microsoft Compatibility Telemetry through CMD
You can disable Microsoft Compatibility Telemetry using CMD command from your Windows 10 device. You have to just write a small command in the CMD prompt and you will be good to go. To do so, all you have to do is follow the steps shared below & disable it.
- Open the RUN window. Press Windows + R simultaneously to open the RUN dialogue box.
- Now type CMD in the text area.
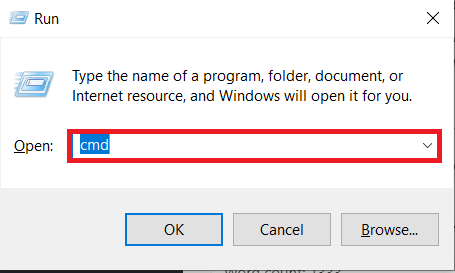
- In order to run CMD as an administrator, press CTRL + SHIFT + ENTER after the previous step.
- Copy the commands below and paste it in the CMD dialogue box.
sc delete DiagTrack sc delete dmwappushservice echo “” >
C:\ProgramData\Microsoft\Diagnosis\ETLLogs\AutoLogger\AutoLogger-Diagtrack-Listener.etl reg add
“HKLM\SOFTWARE\Policies\Microsoft\Windows\DataCollection” /v AllowTelemetry /t REG_DWORD /d 0 /f
- Press Enter after every command & you’re done disabling Compatibility Telemetry on your Windows 10 system.
If you face any issue or trouble while following the above method, you can proceed ahead and give a try to the other methods mentioned below and disable Microsoft Compatibility Telemetry in Windows.
Disable Microsoft Compatibility Telemetry by deleting CompaTelRunner.exe
You can even delete CompaTelRunner.exe setup from your system, it will result in disabling Compatibility Telemetry. Follow the below steps in order to delete CompaTelRunner.exe from Windows 10 system.
- First of all, you should be logged in as an administrator in the system.
- Open the RUN dialogue box by simply pressing WIN + R buttons simultaneously.
- Type C:WindowsSystem32 and press Enter.
- You will see a new window with the path you typed in the RUN command. Find for CompaTellRunner.exe file there.

- Right-Click on the file you find named as CompaTellRunner. Click on Properties.
- Now, you will see the Properties tab opening on your screen. Navigate to the Security tab.
- Click on Advanced Settings under the Security tab. In the new dialogue box, select the owner tab. Click on the Edit button there.

- Under the Edit dialogue box, select Administrator & click on Apply and Ok at the end.
- Before you delete the file, you need to get full permissions from the properties tab > advanced settings > permission.
- Now select the current user from this list & tick on Full permission.
- Now, delete the CompatTelRunner file from the same directory we opened in the fourth step.
- Empty the Recycle bin if you deleted it temporarily.
You’re done deleting the CompaTellRunner file from Windows 10 hence disabling Compatibility Telemetry from your system.
CHECKOUT – How to Fix High Disk & CPU Usage by WSAPPX in Windows 10?
Disable CompatTelTunner.exe through Task Scheduler
Compatteltunner.exe is a file also responsible for Compatibility Telemetry on Windows 10. You can disable the execution of this file in order to disable the Compatibility Telemetry High Disk Usage issue. Follow the steps below to disable CompatTelTunner.exe:
- Open the RUN window. Press WIN + R simultaneously
- Now, type taskschd.msc in the text area and press enter.
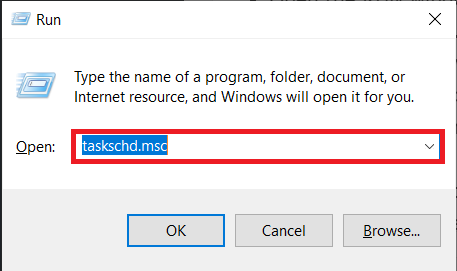
- You will see a new window on your screen. It’s the Task Scheduler of your system.
- Click on the Task Scheduler Library.
- Click on the folder named Microsoft. Expand folder named Windows by clicking on it.

- Navigate to Application Experience. You will see a new window after clicking on it.
- Now, find for the task named as Microsoft Compatibility Appraiser. Right-click on it and select Disable.
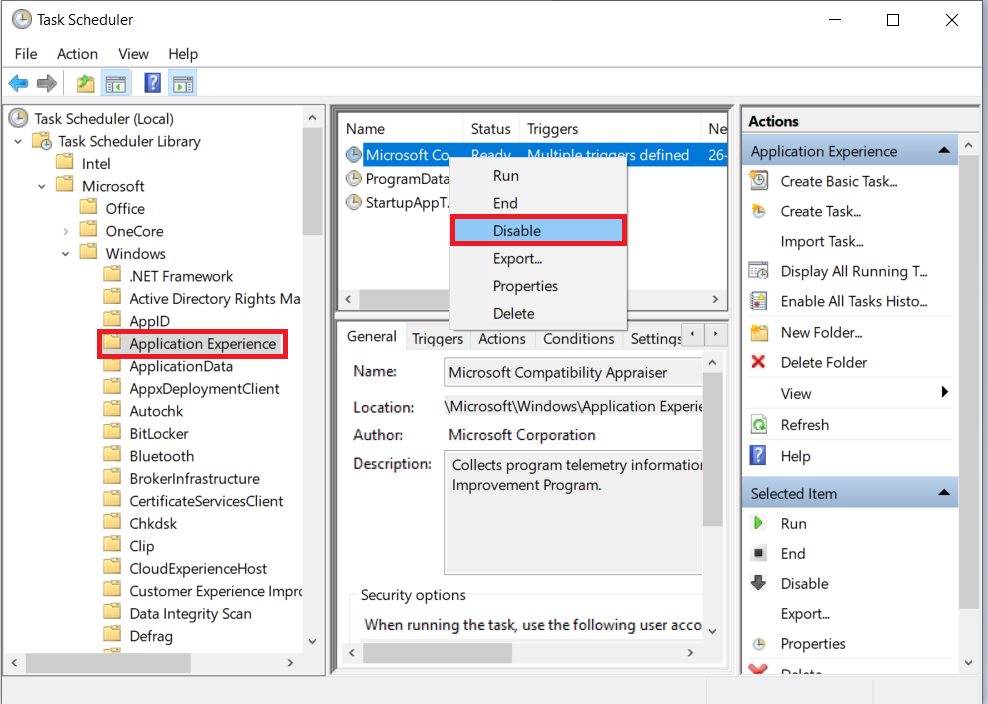
- Restart your computer. CompatTeltunner.exe is disabled, resulting in disabling Microsoft Compatibility Telemetry High Disk Usage.
So this way we have disabled the scheduled process named CompatTelTunner which runs the Microsoft Compatibility Telemetry process periodically in your Windows system.
ALSO CHECK – How to Fix High CPU Usage Caused by WMI Provider Host?
Disable Compatibility Telemetry through Group Policy Editor
You can also use the Group Policy Editor to disable Compatibility Telemetry on your Computer/Laptop. This will basically disable some authority from Compatibility Telemetry through Group Policy Editor. Follow the steps below and disable Microsoft Compatibility Telemetry High Disk Usage issue from your Windows 10 system.
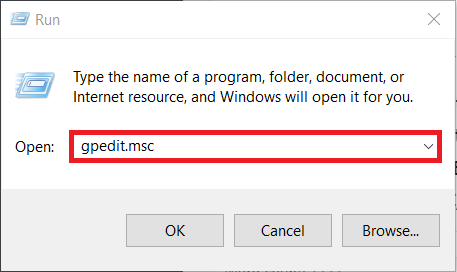
- Open a RUN dialogue box, press WIN+R simultaneously.
- Type the command: gpedit.msc and press Enter.
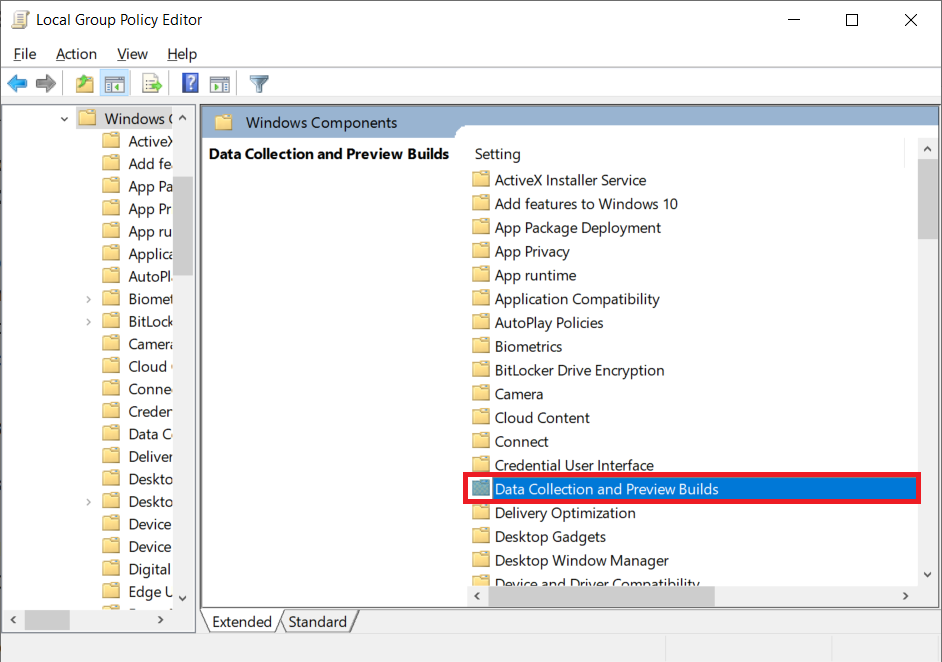
- Now, click on Computer Configuration, expand Administrative Templates.
- Expand Windows Components & Click on Data Collection and Preview Builds from the right panel.
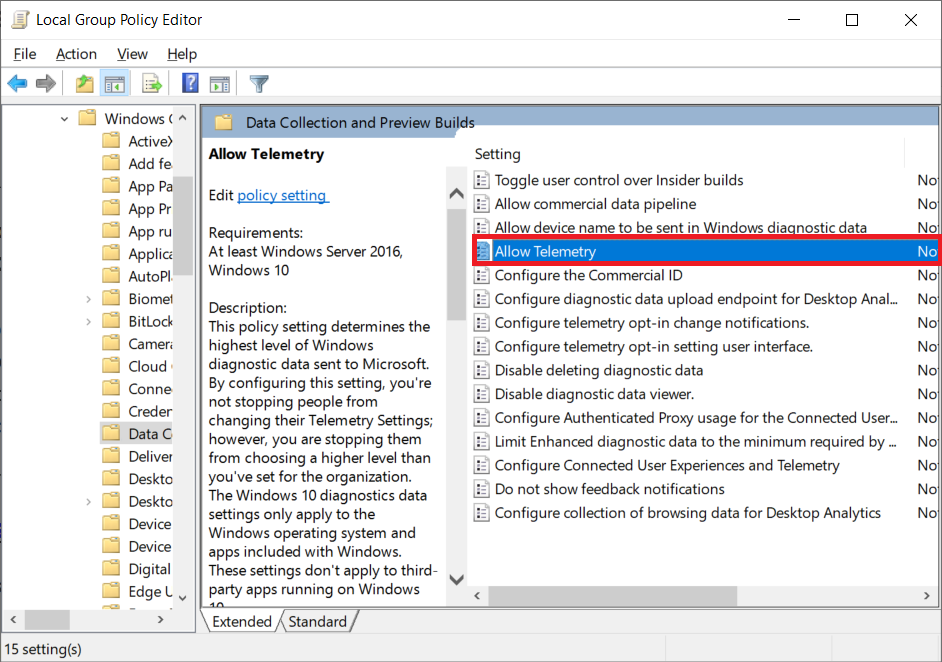
- Now, Double-click on the Allow Telemetry option.
- Select Disabled from the sidebar.
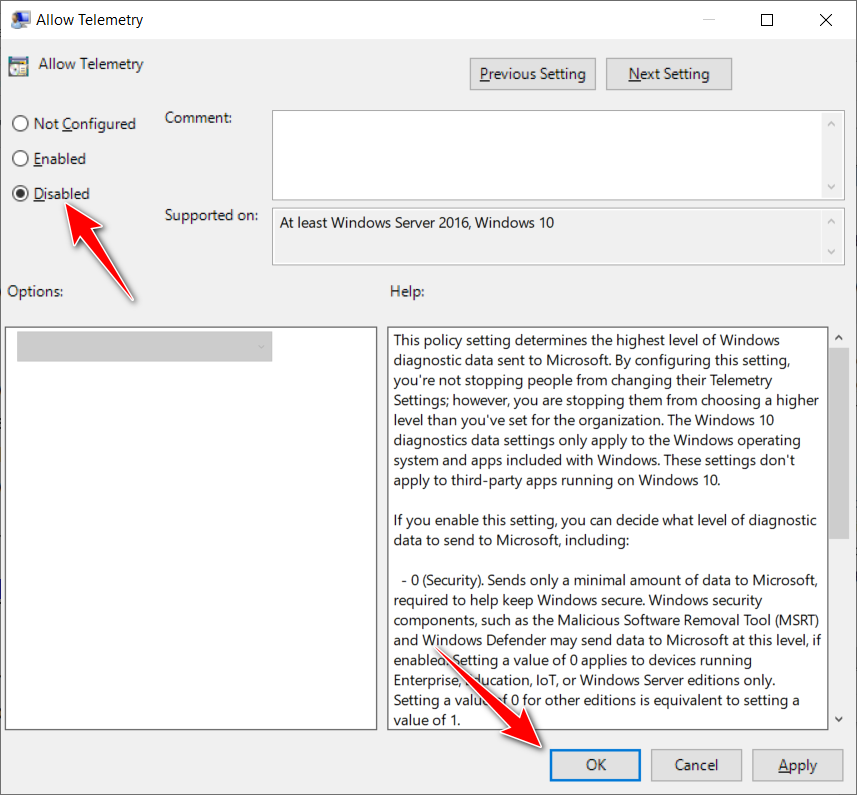
- Click on Apply and then OK.
- Now, Restart your computer and you’re good to go.
ALSO REFER – How to Fix High CPU Usage Issue Caused by Antimalware Service Executable?
Disable High Disk Usage through Registry Editor
You can also use Registry Editor to fix the High Disk Usage Issue on your Windows 10 system. This is one of the methods to disable High Disk Usage on your Windows PC / Laptop using Registry Editor. All you have to do is follow the steps below and Disable High Disk Usage on your PC/Laptop.
- Open the RUN window by pressing WIN+R together.
- In the text area, type regedit and press Enter.
- If prompted, click on Yes on the dialogue box by User Account Control.
- Now, navigate to HKEY_LOCAL_MACHINE and Expand SOFTWARE.
- Expand Policies, then Microsoft, then Windows.
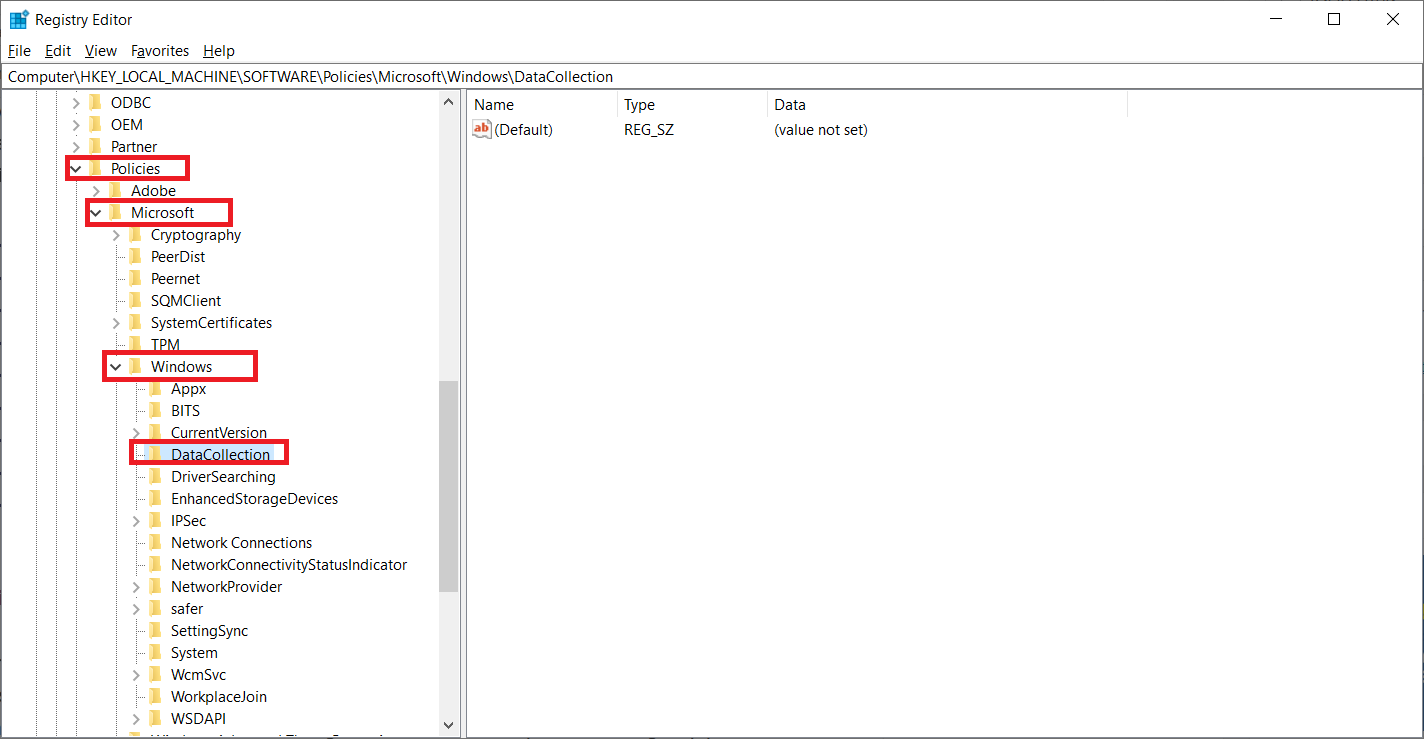
- Click on DataCollection
- Double-click on option termed as Allow Telemetry
- In the Value Data, Type 0 (zero) and click on OK.
- Restart Your PC & you’ve now disabled Microsoft Compatibility Telemetry to reduce High Disk Usage.
RELATED SOLUTIONS:
Final Verdict…
That was all about the methods to fix Microsoft Compatibility Telemetry High Disk Usage issue on a Windows PC or Laptop. If you have any queries regarding any of the methods mentioned above, let us know through the comments. If you are facing any problem while following the steps, we will be happy to resolve, comment them down.
Having any suggestions/queries/feedback? Share them with us in the comments. We’ve completely tested out all of these methods and were successful in disabling the Compatibility Telemetry High Disk Usage on our systems. Follow us on all social media platforms to get the latest updates, tips n tricks, how to’s & much more.
[ad_2]